

Prerequisites
Before you expose an agent graph:- Publish at least one version of the agent graph. See Agent Graph publishing.
- Hold Developer role or higher for Graph Studio save/publish actions.
- Have permission to call registry APIs (
assistants.flows:createvia the gatewayPOST /a2a-registry). - Run in a local or dev environment where Configure Agent is visible in Graph Studio (see Overview — Access and environment).
Open the expose flow
- Open Graph Studio for your project.
- Select the agent graph you want to expose.
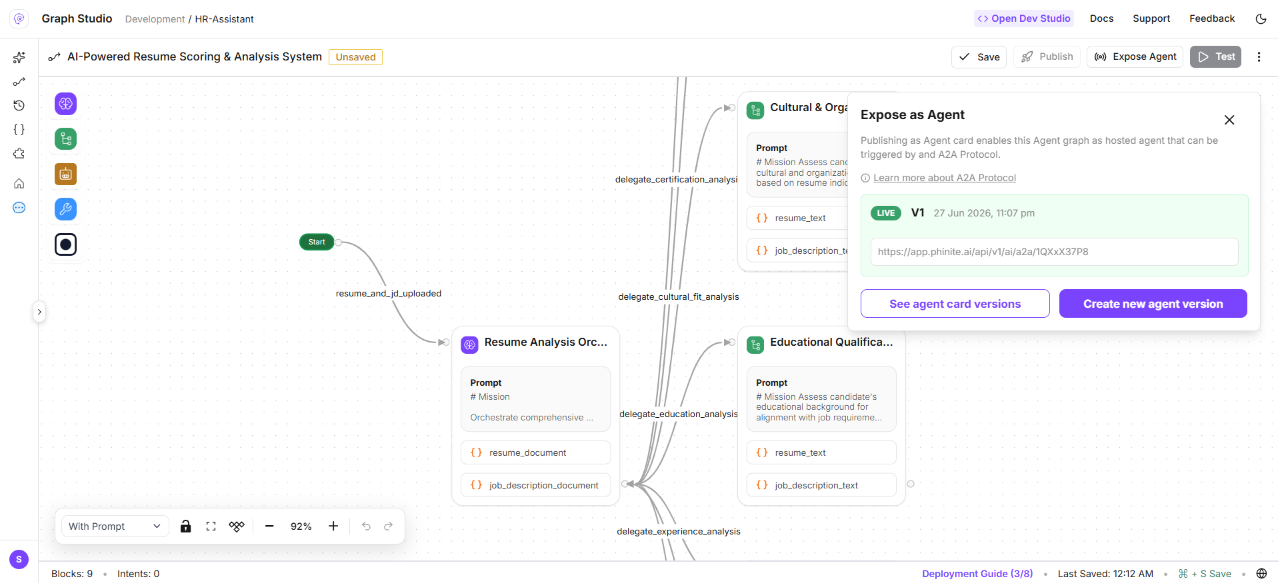
- In the canvas header, click Configure Agent (dev environments only).
- In the Expose as Agent modal, review any existing test/live builds and hosted URLs.
- Click Create New Build to open the Expose as External Agent wizard.
Wizard steps
The wizard has three steps. Step labels in the UI:
Primary actions: Next (steps 1–2), Attach Agent Card (step 3).
Step 1 — Agent Build Config
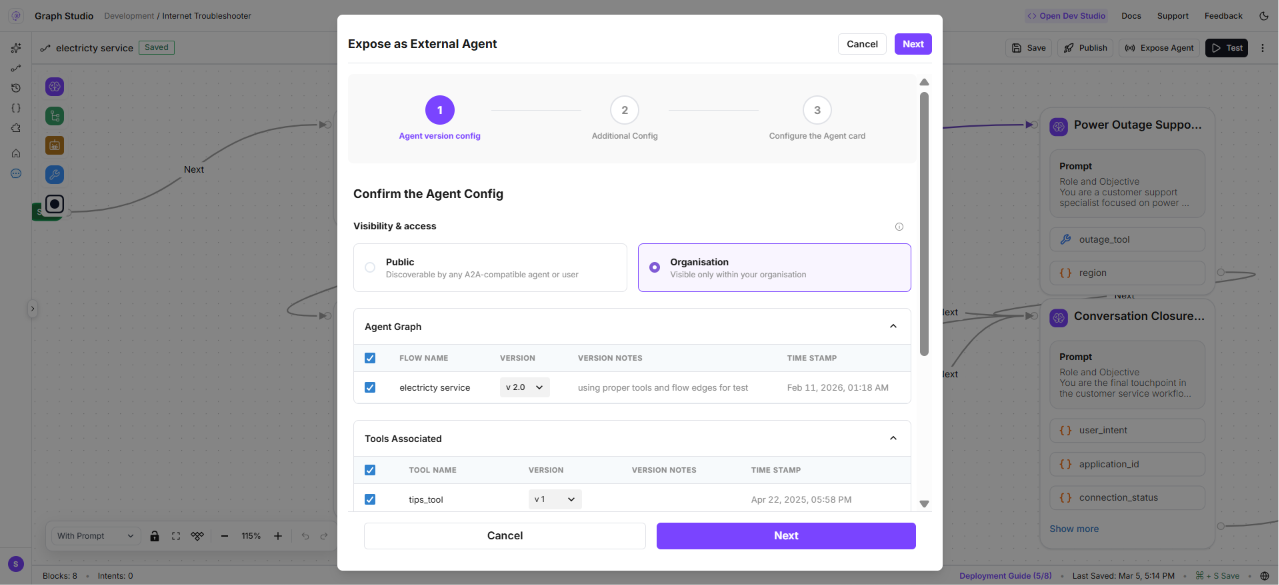
- Agent Graph accordion — select the flow version to register (name, version number, version notes, timestamp).
- Tools Associated accordion — select published tool versions linked to the graph. Unpublished tools show a Publish action inline.
Step 2 — Additional Config
Variables and Secrets:- Toggle Export to build to include predefined tools, MCP tools, or environment variables in the registry build.
- When enabled, use tabs Predefined, MCP, and Env and search Search tools and variables…
- For each exported row, provide a description (required).
Step 3 — Configure the Agent card
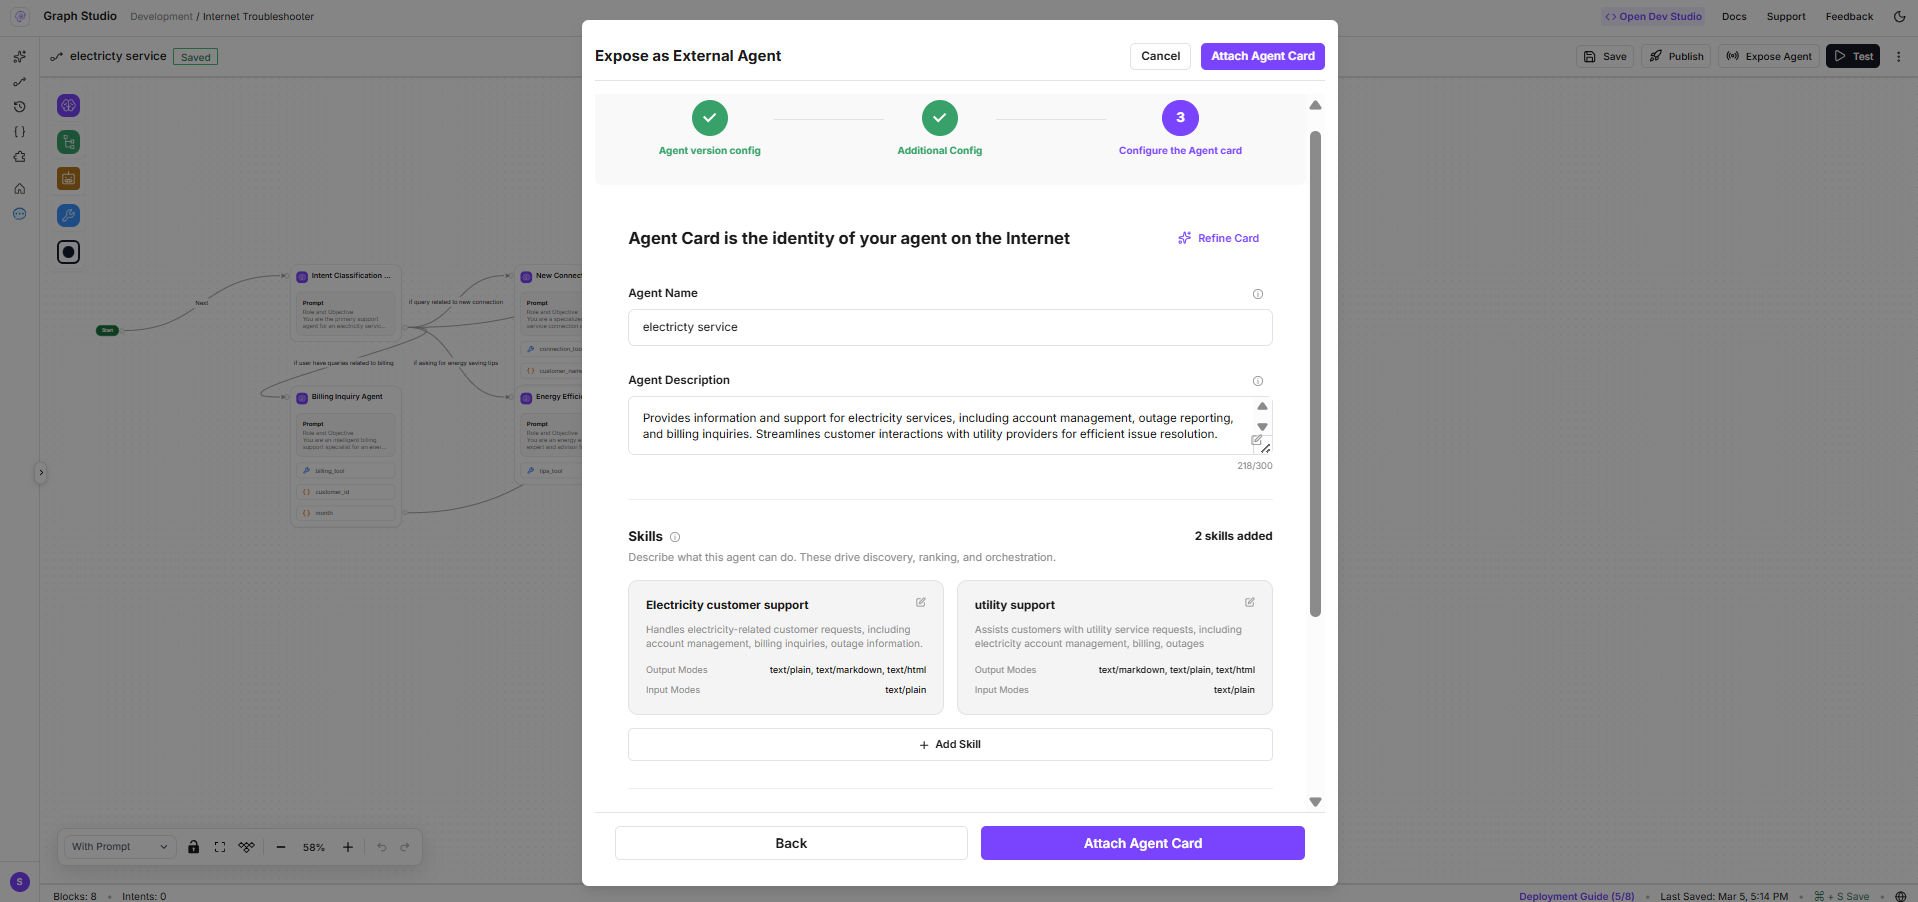
Click Attach Agent Card to submit. The UI calls
POST /a2a-registry?workspaceid={workspaceId} with the wizard payload (agent_card, flowid, flow_version, assistantid, tools, and optional export config).
After registration
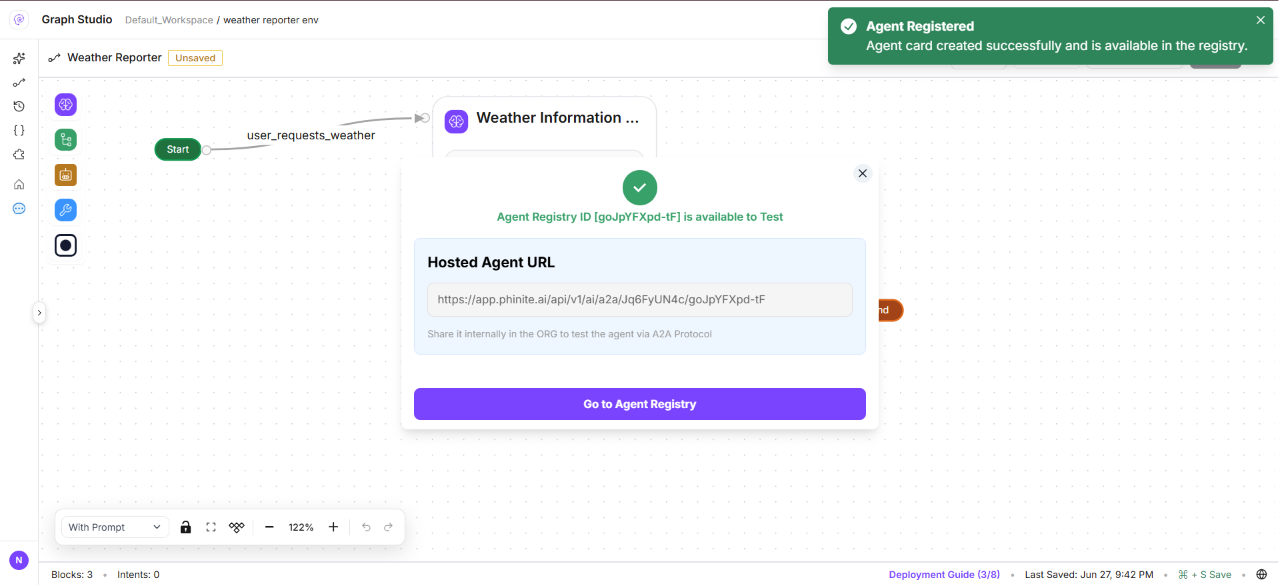
- Note the Agent Registry ID and hosted A2A URL (test builds use the registry ID in the path—see Endpoints & lifecycle).
- The success message indicates the build is available to Test.
- Click Go to Agent Registry to open the workspace catalog.
test. Promote to live from Agent Cards when you are ready for production routing.
Related pages
Endpoints & lifecycle
Test vs live URL patterns and promotion.
Browse the catalog
Find and inspect registered agents.