> ## Documentation Index
> Fetch the complete documentation index at: https://docs.phinite.ai/llms.txt
> Use this file to discover all available pages before exploring further.
# Graph creation methods
> Build Agent Graphs with Phinite Aura or the manual canvas.
Choose how you bootstrap and refine an Agent Graph. Both methods use the same canvas, drawer, and **Save** → **Build** workflow.
## Phinite Aura (prompt-based)
**Aura** turns a plain-language goal into a draft canvas — nodes, edges, tool hints, and variable suggestions.
1. Open **Graph Studio** or start **New Agent Graph**.
2. Open **Phinite Aura** in the left sidebar (often open by default with **Agent Graph Context Active**).
3. Describe goal, inputs, knowledge sources, tools, and expected outputs.
4. Review proposed builds/edits; apply when ready; validate each node drawer (**Details**, **RAG**, **Tools**, **Variables**).
5. Refine on the canvas, then **Save**.
 | Include in your prompt | Why |
| ---------------------- | -------------------------------------- |
| **Goal** | What the graph should achieve |
| **Inputs** | Variables and formats the run receives |
| **Knowledge** | RAG collections to ground answers |
| **Tools** | APIs or integrations to call |
| **Success criteria** | Expected outputs |
Name relevant RAG collections and [Tools](/devstudio/overview) in your Aura prompt for better first drafts.
Before **Save**, confirm a clear path from **Start** to **End** and that branch edge labels match your design ([Connections](/graph-studio/connections)).
## Manual canvas
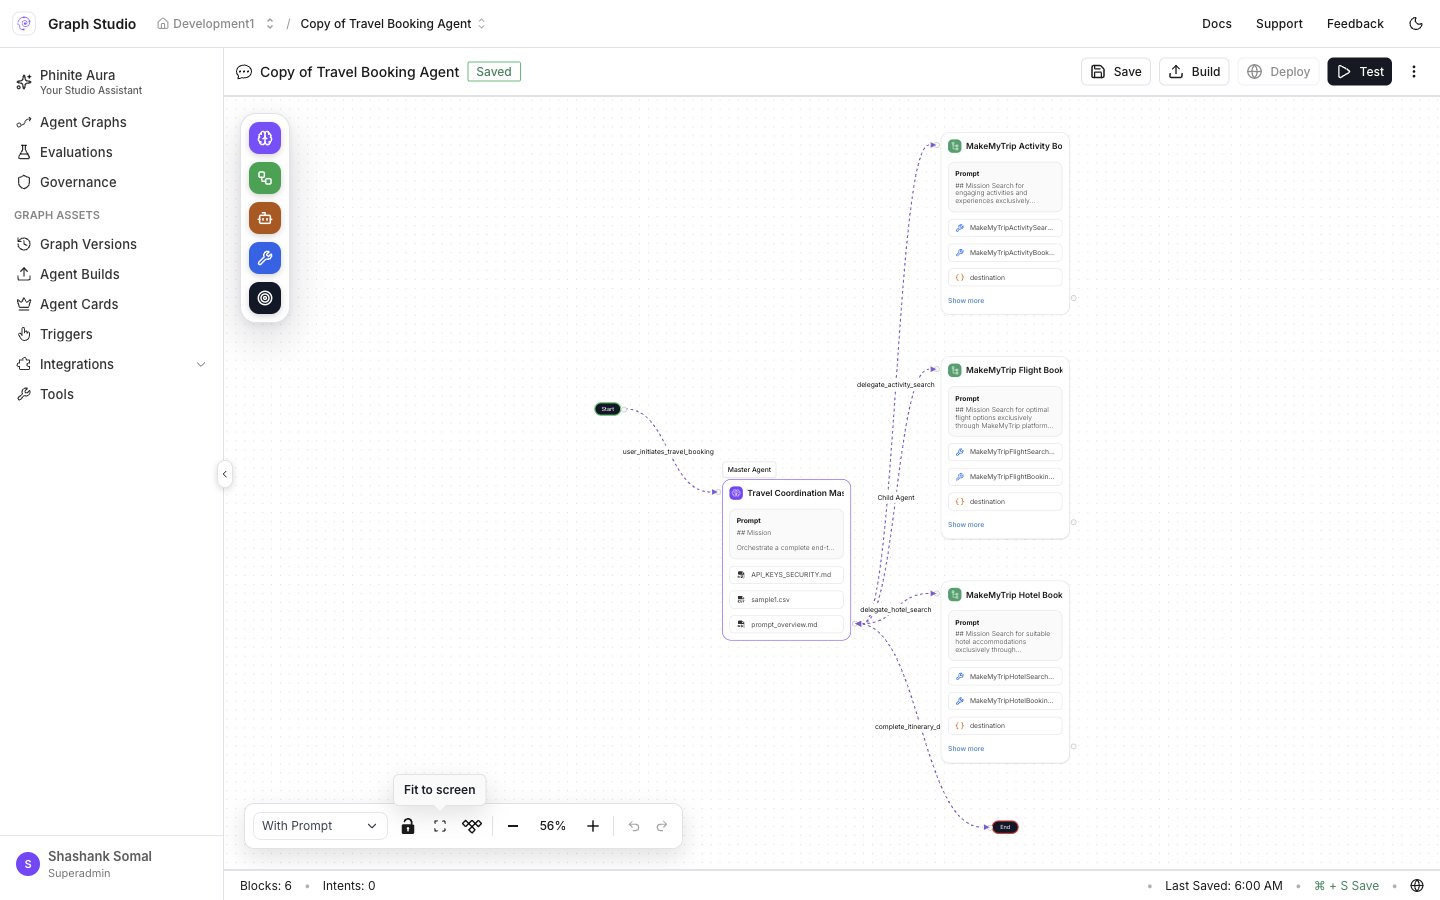
Use the manual canvas for full control over placement, edge order, and drawer configuration.
1. **New Agent Graph** → choose **Conversational** or **Autonomous** → **Create**.
2. **Add nodes** from the floating canvas palette ([Node types](/graph-studio/interface/node-library)).
3. **Connect edges** ([Connections](/graph-studio/connections)).
4. **Configure the drawer** ([Agent configuration](/graph-studio/interface/node-library)).
5. **Test** from the toolbar, then **Save**.
| Include in your prompt | Why |
| ---------------------- | -------------------------------------- |
| **Goal** | What the graph should achieve |
| **Inputs** | Variables and formats the run receives |
| **Knowledge** | RAG collections to ground answers |
| **Tools** | APIs or integrations to call |
| **Success criteria** | Expected outputs |
Name relevant RAG collections and [Tools](/devstudio/overview) in your Aura prompt for better first drafts.
Before **Save**, confirm a clear path from **Start** to **End** and that branch edge labels match your design ([Connections](/graph-studio/connections)).
## Manual canvas
Use the manual canvas for full control over placement, edge order, and drawer configuration.
1. **New Agent Graph** → choose **Conversational** or **Autonomous** → **Create**.
2. **Add nodes** from the floating canvas palette ([Node types](/graph-studio/interface/node-library)).
3. **Connect edges** ([Connections](/graph-studio/connections)).
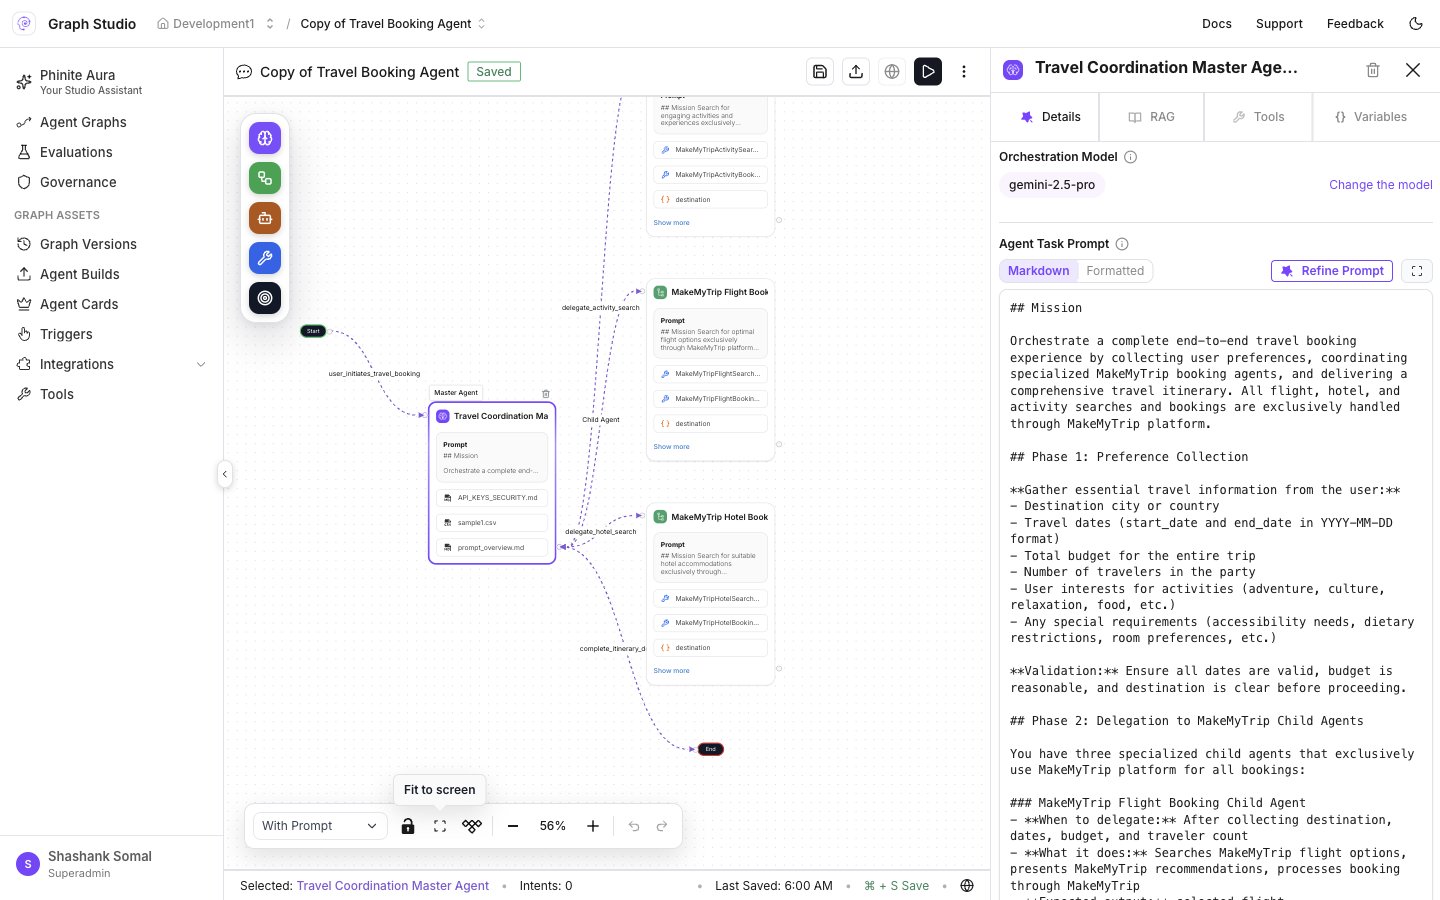
4. **Configure the drawer** ([Agent configuration](/graph-studio/interface/node-library)).
5. **Test** from the toolbar, then **Save**.
 ### Iterate
1. Run sample inputs from **Test**.
2. Refine prompts, RAG, and [variables](/graph-studio/interface#variables).
3. Adjust [conditional edges](/graph-studio/connections) for branching graphs.
4. **Save** after each meaningful change.
## Related
* [Graph Studio overview](/graph-studio/overview)
* [Publishing](/graph-studio/publishing)
### Iterate
1. Run sample inputs from **Test**.
2. Refine prompts, RAG, and [variables](/graph-studio/interface#variables).
3. Adjust [conditional edges](/graph-studio/connections) for branching graphs.
4. **Save** after each meaningful change.
## Related
* [Graph Studio overview](/graph-studio/overview)
* [Publishing](/graph-studio/publishing)