> ## Documentation Index
> Fetch the complete documentation index at: https://docs.phinite.ai/llms.txt
> Use this file to discover all available pages before exploring further.
# Slack
> Connect Slack and Microsoft Teams as conversational channels.
## Setup
 ## Connecting Your Agentic Bot to Slack
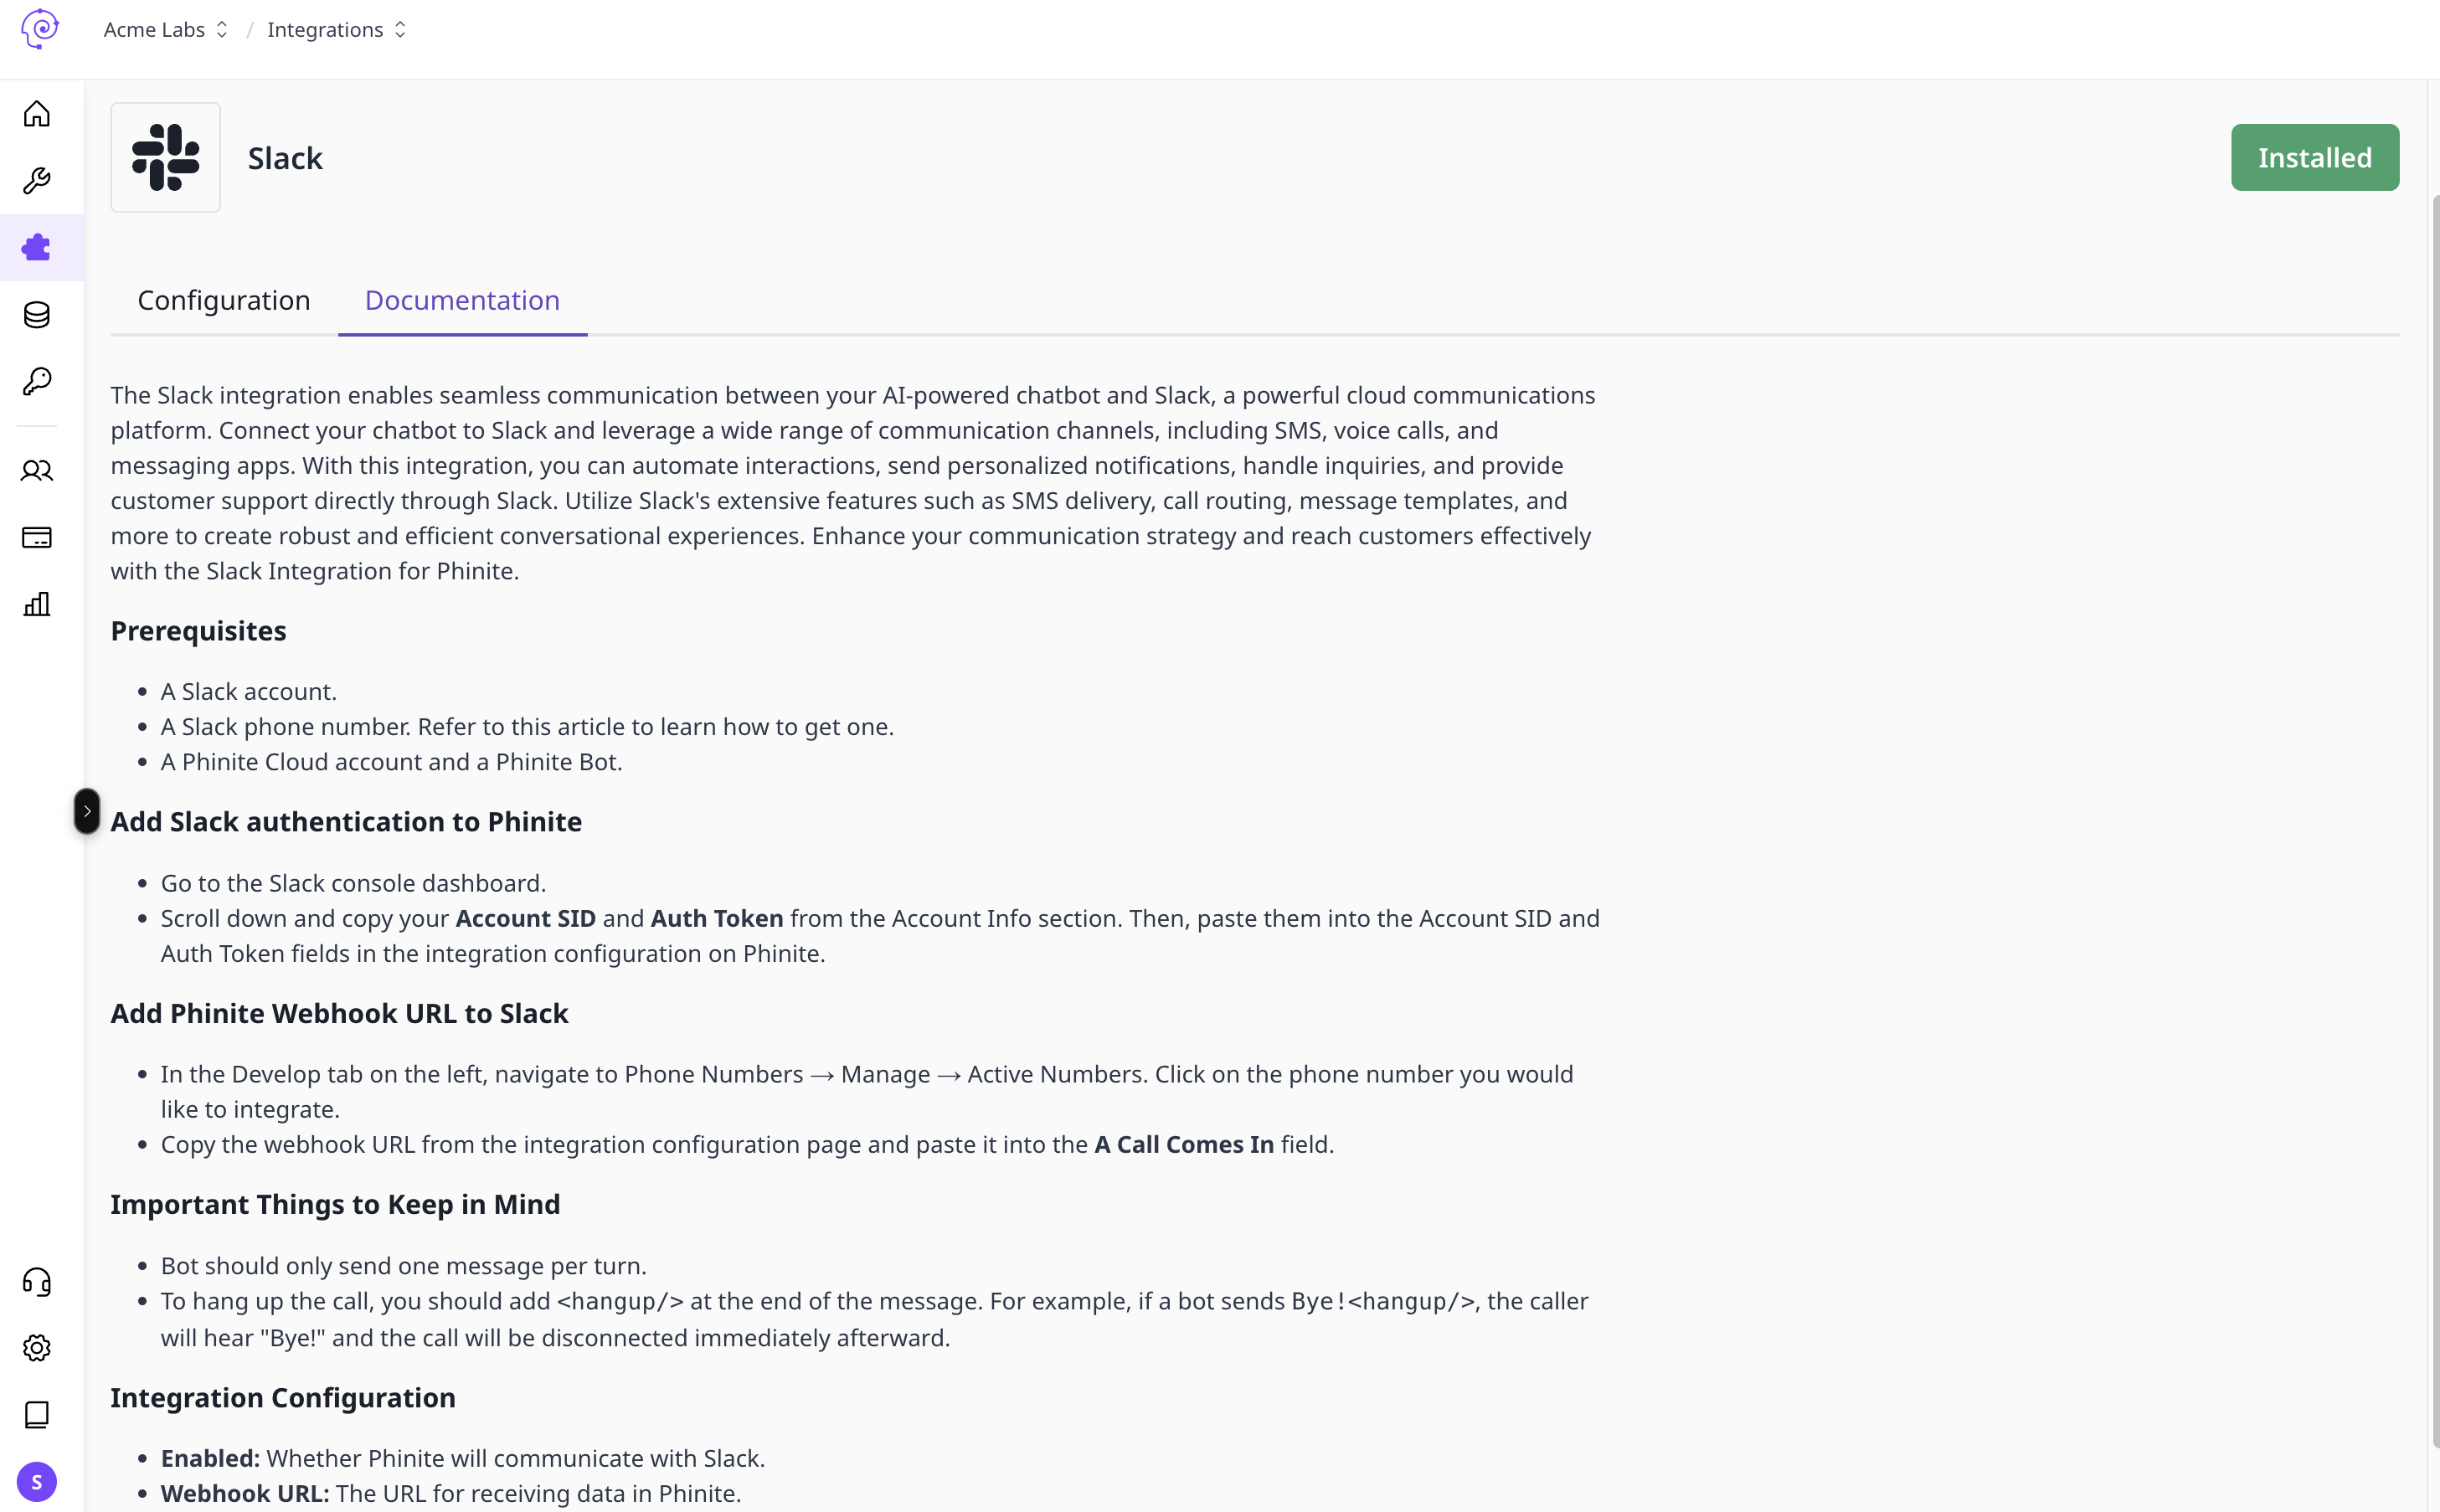
This guide will help you connect your AI-powered agentic chatbot with Slack, enabling your bot to send and receive messages directly in your Slack workspace.
Once connected, your bot can:
* Reply to Slack users in real time
* Send automated updates or alerts
* Handle customer support directly from Slack
***
### Step 1: Create a New Slack Configuration
1. Navigate to your website’s **Integrations → Slack** section.
2. Click **➕ Add Configuration** or **New Configuration**.
3. A new configuration form will open (as shown in the image above).
4. Fill in the following fields:
* **SignIn Secret**
* **SignIn Bot Token**
* *(Optional)* Configuration name
5. Choose the agent (if applicable) you want to connect from the dropdown menu.
6. Click **💾 Save Configuration**.
Once saved, you’ll see **Webhook URLs** generated for each environment:
* **DEV** — Development
* **UAT** — Testing
* **PROD** — Production
These URLs will be used later inside your Slack App settings.
***
### Step 2: Create a Slack App
Before you can fill in your SignIn credentials, you need to register a Slack App.
1. Go to [Slack API Apps](https://api.slack.com/apps).
2. Click **Create New App → From scratch**.
3. Enter an **App Name** (e.g., *Agentic Chatbot*).
4. Select the **Workspace** where you want to install the bot.
5. Click **Create App**.
You’ve now created a Slack app — next, we’ll configure permissions and tokens.
***
### Step 3: Generate the Bot Token
1. In your app’s left sidebar, go to **OAuth & Permissions**.
2. Scroll to the **Scopes** section.
3. Under **Bot Token Scopes**, add the following recommended permissions:
```bash theme={null}
chat:write
channels:read
channels:history
im:read
im:history
users:read
files:read
files:write
```
*(You can add more scopes depending on your bot’s features.)*
4. Scroll up and click **Install to Workspace**.
5. Authorize the app by clicking **Allow**.
6. Copy the **Bot User OAuth Token** — it starts with `xoxb-...`.
7. Paste this token into your website’s **SignIn Bot Token** field.
***
### Step 4: Get Your Signing Secret
1. In your Slack App settings, go to **Basic Information**.
2. Scroll down to **App Credentials**.
3. Copy the **Signing Secret**.
4. Paste it into the **SignIn Secret** field in your website’s configuration form.
***
### Step 5: Save and Copy the Webhook URL
Once both fields are filled, click **Save Configuration**.
After saving, your integration will generate **Webhook URLs** for each environment:
```bash theme={null}
DEV: https://api-server-dev.yourdomain.ai/slack/.../development
UAT: https://api-server-dev.yourdomain.ai/slack/.../uat
PROD: https://api-server-dev.yourdomain.ai/slack/.../production
```
***
### Step 6: Connect Your Bot to Slack Events
Now that your app and credentials are ready, you need to link the webhook URL with Slack’s **Event Subscriptions**.
1. In your Slack App, go to **Event Subscriptions** (under *Features*).
2. Turn **ON** “Enable Events.”
3. Copy the appropriate **Webhook URL** (e.g., *DEV*) from your website.
4. Paste it into the **Request URL** field in Slack.
5. Slack will verify the URL automatically.
6. Once verified, scroll down and click **Save Changes**.
💡 **Note:** Slack allows only one Request URL per app.\
If you’re testing, use your DEV URL first and switch to PROD when ready.
***
### Optional: Subscribe to Events
Still in **Event Subscriptions**, scroll to **Subscribe to bot events** and add the events your chatbot needs, for example:
```bash theme={null}
message.channels → for public channels
message.im → for direct messages
app_mention → to respond when mentioned
```
Click **Save Changes**.
Your chatbot can now listen and respond to these Slack events. 🎉
***
### Summary
| Step | Action | Output |
| ---- | -------------------- | ------------------------------------- |
| 1 | Create configuration | Opens Slack setup form |
| 2 | Create Slack app | Registers app in your workspace |
| 3 | Generate Bot Token | Provides authentication token |
| 4 | Get Signing Secret | Adds verification for secure requests |
| 5 | Save config | Generates webhook URLs |
| 6 | Add webhook to Slack | Connects your bot to Slack events |
***
### Common Issues
**Invalid Request URL:**\
Ensure your webhook URL is publicly accessible (e.g., HTTPS).
**Token Expired:**\
If token rotation is enabled in Slack, tokens may expire after 12 hours.\
Disable token rotation for production use.
**Missing Permissions:**\
Double-check that all required scopes are added under **Bot Token Scopes**.
## Connecting Your Agentic Bot to Slack
This guide will help you connect your AI-powered agentic chatbot with Slack, enabling your bot to send and receive messages directly in your Slack workspace.
Once connected, your bot can:
* Reply to Slack users in real time
* Send automated updates or alerts
* Handle customer support directly from Slack
***
### Step 1: Create a New Slack Configuration
1. Navigate to your website’s **Integrations → Slack** section.
2. Click **➕ Add Configuration** or **New Configuration**.
3. A new configuration form will open (as shown in the image above).
4. Fill in the following fields:
* **SignIn Secret**
* **SignIn Bot Token**
* *(Optional)* Configuration name
5. Choose the agent (if applicable) you want to connect from the dropdown menu.
6. Click **💾 Save Configuration**.
Once saved, you’ll see **Webhook URLs** generated for each environment:
* **DEV** — Development
* **UAT** — Testing
* **PROD** — Production
These URLs will be used later inside your Slack App settings.
***
### Step 2: Create a Slack App
Before you can fill in your SignIn credentials, you need to register a Slack App.
1. Go to [Slack API Apps](https://api.slack.com/apps).
2. Click **Create New App → From scratch**.
3. Enter an **App Name** (e.g., *Agentic Chatbot*).
4. Select the **Workspace** where you want to install the bot.
5. Click **Create App**.
You’ve now created a Slack app — next, we’ll configure permissions and tokens.
***
### Step 3: Generate the Bot Token
1. In your app’s left sidebar, go to **OAuth & Permissions**.
2. Scroll to the **Scopes** section.
3. Under **Bot Token Scopes**, add the following recommended permissions:
```bash theme={null}
chat:write
channels:read
channels:history
im:read
im:history
users:read
files:read
files:write
```
*(You can add more scopes depending on your bot’s features.)*
4. Scroll up and click **Install to Workspace**.
5. Authorize the app by clicking **Allow**.
6. Copy the **Bot User OAuth Token** — it starts with `xoxb-...`.
7. Paste this token into your website’s **SignIn Bot Token** field.
***
### Step 4: Get Your Signing Secret
1. In your Slack App settings, go to **Basic Information**.
2. Scroll down to **App Credentials**.
3. Copy the **Signing Secret**.
4. Paste it into the **SignIn Secret** field in your website’s configuration form.
***
### Step 5: Save and Copy the Webhook URL
Once both fields are filled, click **Save Configuration**.
After saving, your integration will generate **Webhook URLs** for each environment:
```bash theme={null}
DEV: https://api-server-dev.yourdomain.ai/slack/.../development
UAT: https://api-server-dev.yourdomain.ai/slack/.../uat
PROD: https://api-server-dev.yourdomain.ai/slack/.../production
```
***
### Step 6: Connect Your Bot to Slack Events
Now that your app and credentials are ready, you need to link the webhook URL with Slack’s **Event Subscriptions**.
1. In your Slack App, go to **Event Subscriptions** (under *Features*).
2. Turn **ON** “Enable Events.”
3. Copy the appropriate **Webhook URL** (e.g., *DEV*) from your website.
4. Paste it into the **Request URL** field in Slack.
5. Slack will verify the URL automatically.
6. Once verified, scroll down and click **Save Changes**.
💡 **Note:** Slack allows only one Request URL per app.\
If you’re testing, use your DEV URL first and switch to PROD when ready.
***
### Optional: Subscribe to Events
Still in **Event Subscriptions**, scroll to **Subscribe to bot events** and add the events your chatbot needs, for example:
```bash theme={null}
message.channels → for public channels
message.im → for direct messages
app_mention → to respond when mentioned
```
Click **Save Changes**.
Your chatbot can now listen and respond to these Slack events. 🎉
***
### Summary
| Step | Action | Output |
| ---- | -------------------- | ------------------------------------- |
| 1 | Create configuration | Opens Slack setup form |
| 2 | Create Slack app | Registers app in your workspace |
| 3 | Generate Bot Token | Provides authentication token |
| 4 | Get Signing Secret | Adds verification for secure requests |
| 5 | Save config | Generates webhook URLs |
| 6 | Add webhook to Slack | Connects your bot to Slack events |
***
### Common Issues
**Invalid Request URL:**\
Ensure your webhook URL is publicly accessible (e.g., HTTPS).
**Token Expired:**\
If token rotation is enabled in Slack, tokens may expire after 12 hours.\
Disable token rotation for production use.
**Missing Permissions:**\
Double-check that all required scopes are added under **Bot Token Scopes**.